Featured
Posted in Fashion

3 ways to style your shrug !!!

Hey !! My name is Rishita. I make Fashion related blogs that helps you to improve your Style.

Today I am gonna tell you about shrugs. We all have shrugs but got bored after wearing it two or three times😌. So here is my tips to style😎 your shrug in three totally different ways. Ok… so before you all got bored😂…lets start😍 !!!

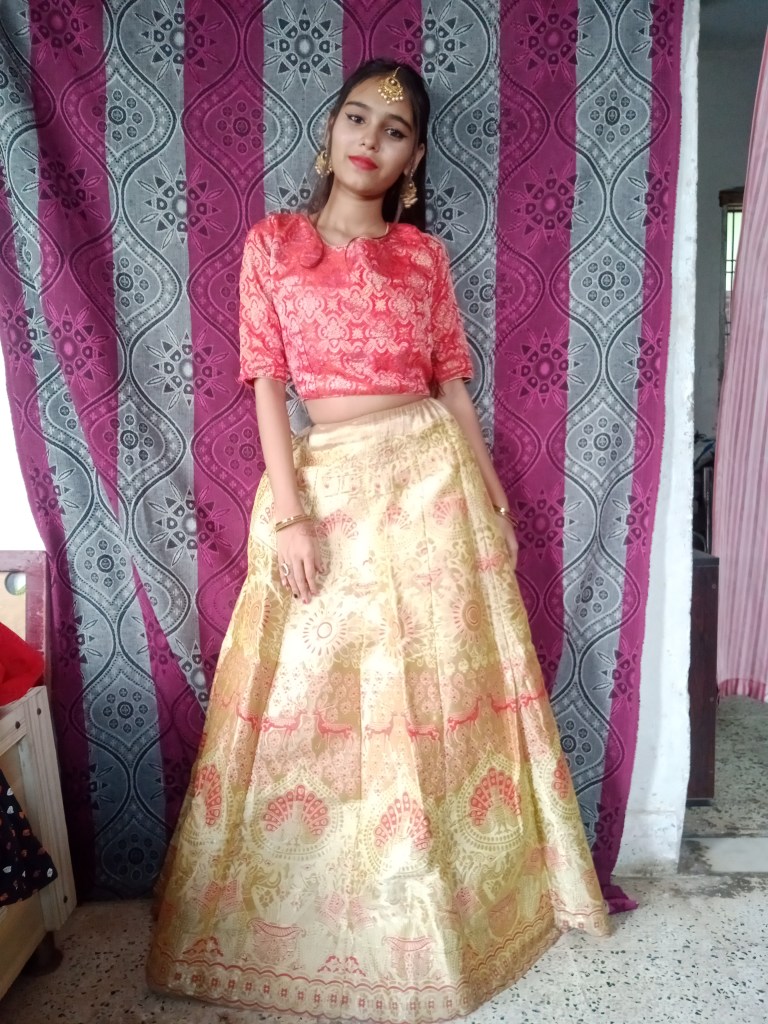
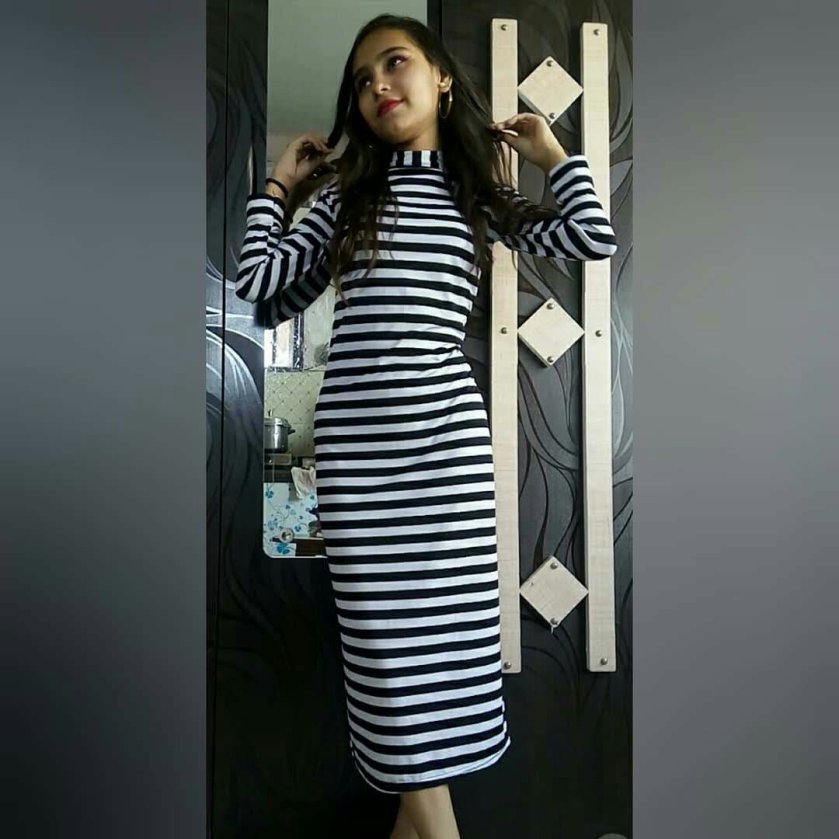
Look 1 :- Shrug to bodycon dress.

For the first look you don’t have to do much struggle just reverse your shrug ( I mean back side in front and front side back ). Now join the back ( middle and end ) using safety pin. Isn’t it so easy??

Look 2 :- Shrug to slit skirt.

For this look , just tie your shrug on you waist just like a jacket. But tie it on one side to get a slit and than join the slit using safety pin ( length of slit depends upon you ) I join it after 20 cms from the top.

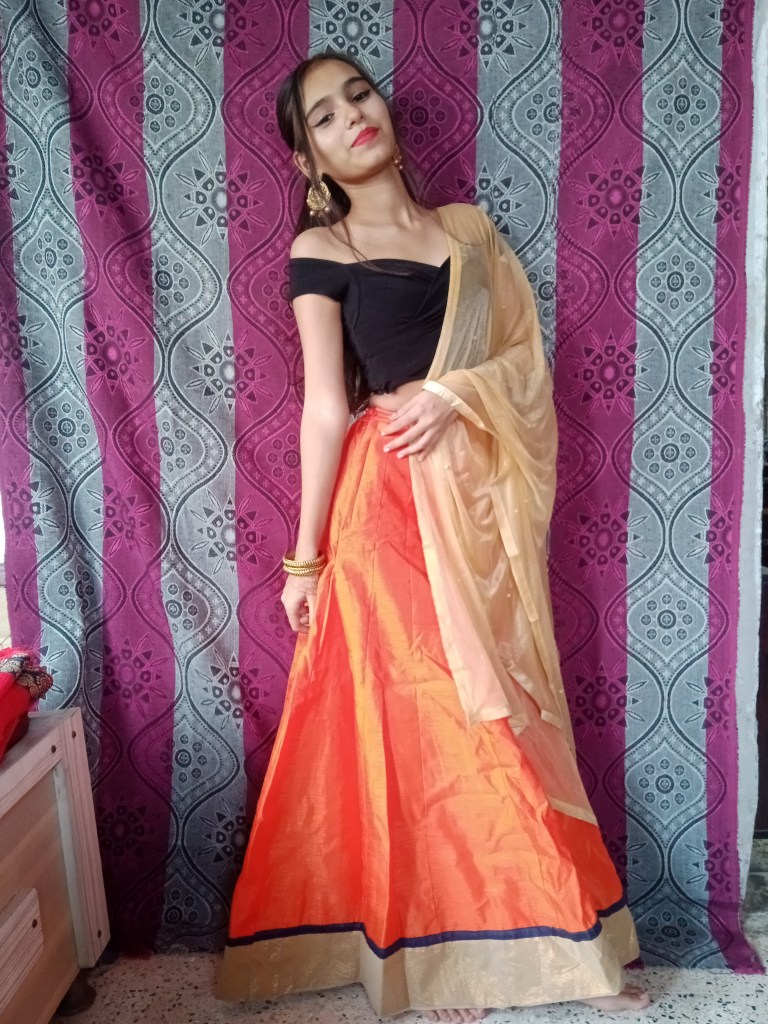
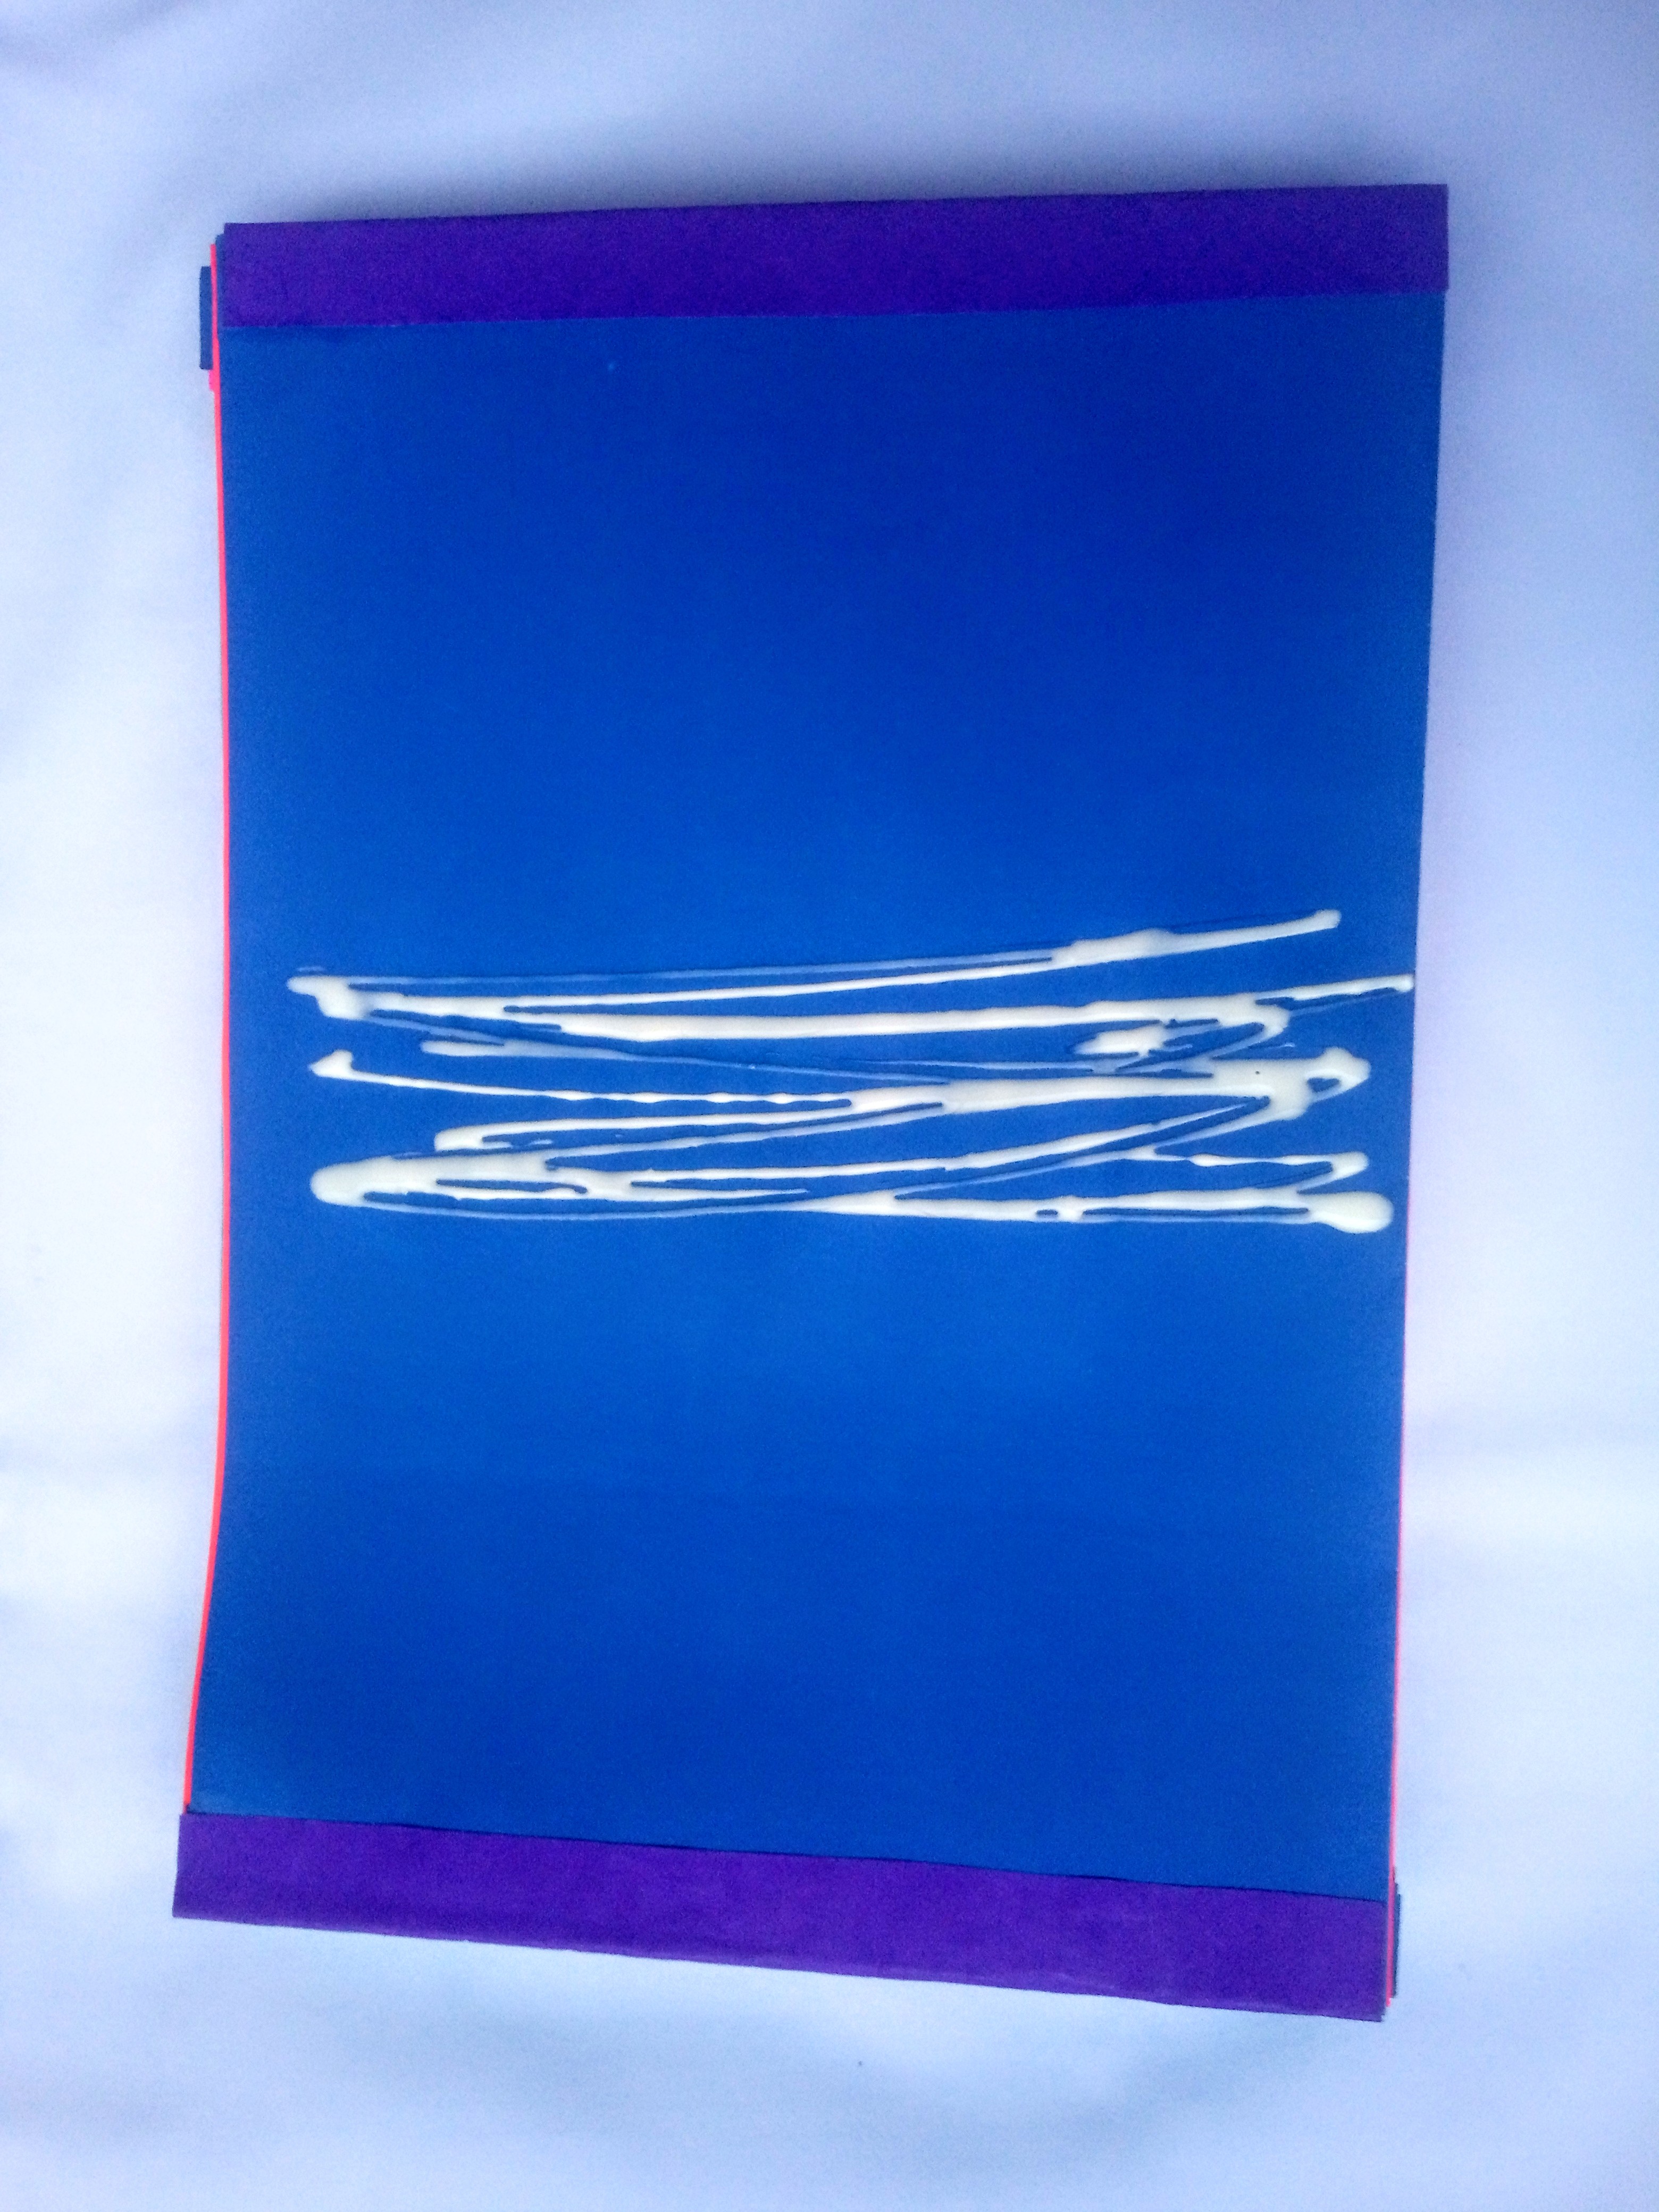
Look 3 :- Shrug to off shoulder maxi dress.

For this look , join the middle part of you shrug without wearing sleeves. After that just tie the sleeves in a criss cross manner ( refer the picture given below ). Join the remaining portion by using safety pins of just stitch it.

Follow me on my Instagram account @_.cute_pixel_08._

Subscribe to my diy YouTube channel “R.K.B Creations

Posted in Fashion

Styling Red Dress in 5 Different ways!!

For the first look, I paired the dress with black palazzo and same colour Dupatta. Added a statement earrings to complete this look😉

For the second look, I paired dress with same colour palazzo and tuck the dress inside to make it look like jumpsuit(hacks😉).

For the third look, I paired the dress with shirt dress (Cardigan or shrug would also look amazing ). Added a cute necklace and a classic watch.

For the fourth look, I took the same shirt dress but wore it as a tie up shirt.

For the last look , I wore a printed top over the dress and tuck it inside the belt to give a crop top look. Added a statement black necklace to complete the look.

Watch the styling Video on my Instagram handle that is

styledbyrishita

Thank you for reading.

Honest review is expected😊.Pls comment down below.

Posted in Fashion

Wedding Guest Outfit Ideas!!

Hey guys, so finally i am back again with a new blog. Today i am gonna share some outfit ideas for wedding season. SO lets start!

Outfit 1 :-

For this look, I paired orange lehenga skirt with black off-shoulder crop top and golden dupatta. You can switchorange skirt with any colour because black and golden matches with almost every colour.

Outfit 2:-

For this look, I paired blue lehenga and pink kurta with a slit to get a indo-western look. The combination Pink and blue are the best for weddings according to me.

Outfit 3 :-

This look is little heavy for a wedding guest but you can definitely wear this. For this look, I paired red and golden lehenga with red blouse.

These is my Favorite look from all three. Do comment and let me know…which one is your fav?

Follow me on instagram

http://www.instagram.com/stylebyrishita

Posted in diy

Diy scrapbook folder for drawings

Hey readers…

Writing this after so long. I don’t know why I stop writing blogs but don’t worry I am back with new content 🤗.

So let’s get started with today’s topic that is Diy Folder. All of you have seen those plastic kind of paper which look like a file. I hope you all will understand 😅. Okay I will share a picture of that folder below so that you get an idea of what we are making today.

So let’s get started now!!

Materials :-

A4 size Craft paper

Cardboard file or cardboards

Scissors

Glue

Step 1 :-

To make the pocket for the folder we need to fold paper into half.

Step 2 :-

Now take another paper and cut out strips according to the size of the sides (of the paper we folded earlier) We will use these strips to joint the sides of that paper so that it will form a pocket.

Step 3:-

Now fold the strips and stick them on the sides of that folded paper to make the pocket. You can use you tapes instead of strips but I don’t have so many tapes so I use paper.

Make as Many pockets as you want in your folder

Step 4 :-

Now joint all this pockets but remember Stick only the middle portion. See the image for reference

Step 5 :-

Now make a file from cardboard but I already have a readymade file so I didn’t make it. It’s very simple just cut out two flaps and one more small one and joint all using tape or paper.

You can also read another blog for that but I don’t think it is that difficult 😅

Step 6 :-

Stick all the pockets in the file. Make sure to stick the first and last pocket to the file cover so that it gets that folder effect.

You can also make this in a landscape size. You just have to use two full paper and joint them as you joint this one.

Step 7 :-

Decorate the cover According to your choice.

Hope you all like this. I know I am not that clear but I tried my level best to explain.

I also have a YouTube channel so go and check my video. Subscribe if you want to see more such Videos

YouTube

Instagram